 Charlotte’s Mum, Anna, asked me to re-design her engagement ring for her daughter’ 21st birthday. The original ring held a single pearl in the centre of a bypass band in 9ct yellow gold. The pearl had long gone missing so she wanted to replace it with a bezel set moonstone and add some diamonds either side of it.
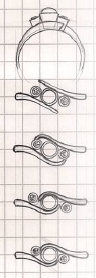
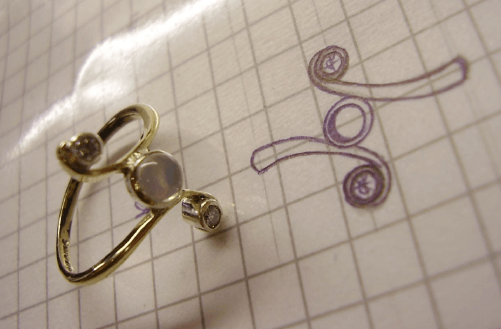
I drew up a series of designs that followed the existing style of the ring, tweaking the bypass style into a low-key twist design with the diamonds set either side of the central moonstone. In the end, Anna plumped for a more dramatic design with the diamonds set in line vertically with the moonstone, totally changing the appearance of the ring into something more suitable for design student Charlotte.
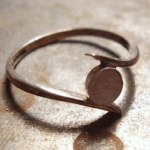 The ring was really fun to make; it started with covering over the original setting for the pearl by soldering a silver disk over it. This provides a good background for the translucent moonstone to help maximise its shimmer, just like the grey coating on the back of a mirror.
The shoulders of the ring needed extending to be able to achieve the elongated twist around the new diamonds. To achieve this, I added new 9ct yellow gold to the shoulders in a curved shape. It’s always best to make the metal a little bigger than you actually need it to be so it can be filed and sanded down to match the existing ring. This is especially important when a curve is involved as it will help to make the extra metal a seemless addition to the ring.
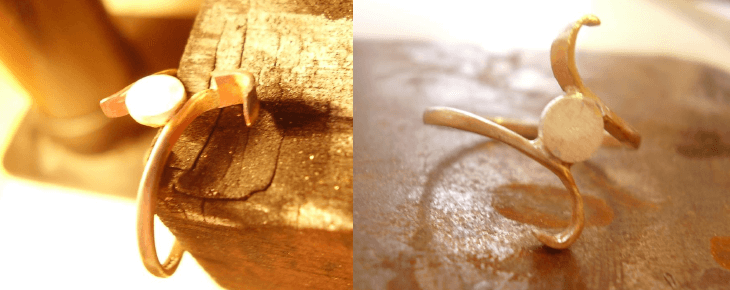
The next job was to create the bezel settings for the diamonds and solder them in place. I constructed the bezel settings from silver tubing; the outside one is a fraction larger than the diameter of the diamonds so they will slot inside it. It is the top edge of this tube which is later bent over the lip of the stones to hold them in place. Inside this larger tube is a smaller one which is shorter and creates a base for the stones to sit on.
-

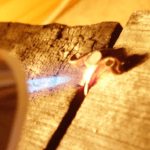
- Diamond settings being soldered in place
-
- The ring ready to be set
-
- Diamonds in place
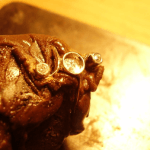
Tube is perfect for bezel settings rather than closing up the space behind the stone entirely because it means the back of the stone can be accessed for cleaning. A jeweller can do this for you with an ultrasonic cleaner which vibrates all the grime from daily wear out of the jewellery, but you can do it at home with a soft toothbrush and soapy water.
Once all the stones were set, this is what the finished piece looked like next to the design:
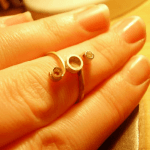
I am really pleased with the combination of metal tones against the rainbow shimmer of the moonstone and flashes from the diamonds. It is always a pleasure to re-design a sentimental piece of jewellery that is no longer worn and give it a new lease of life so it is worn and enjoyed once more.